Editing the camera
The timeline
Section titled “The timeline”From top to bottom the timeline shows:
- the ruler, in timecode or frames (switch with the menu on the right of the toolbar), with markers;
- VIDEO: thumbnails of the visual;
- the waveform of the song’s audio, with bar numbers and beat lines when a BPM is set;
- OPACITÀ CAMERA (camera opacity): the envelope that will be written to Arena, from 0% at the bottom to 100% at the top. With more than one camera in the song there is one lane per camera, each named and coloured; edits always go to the active one;
- an overview strip of the whole song.
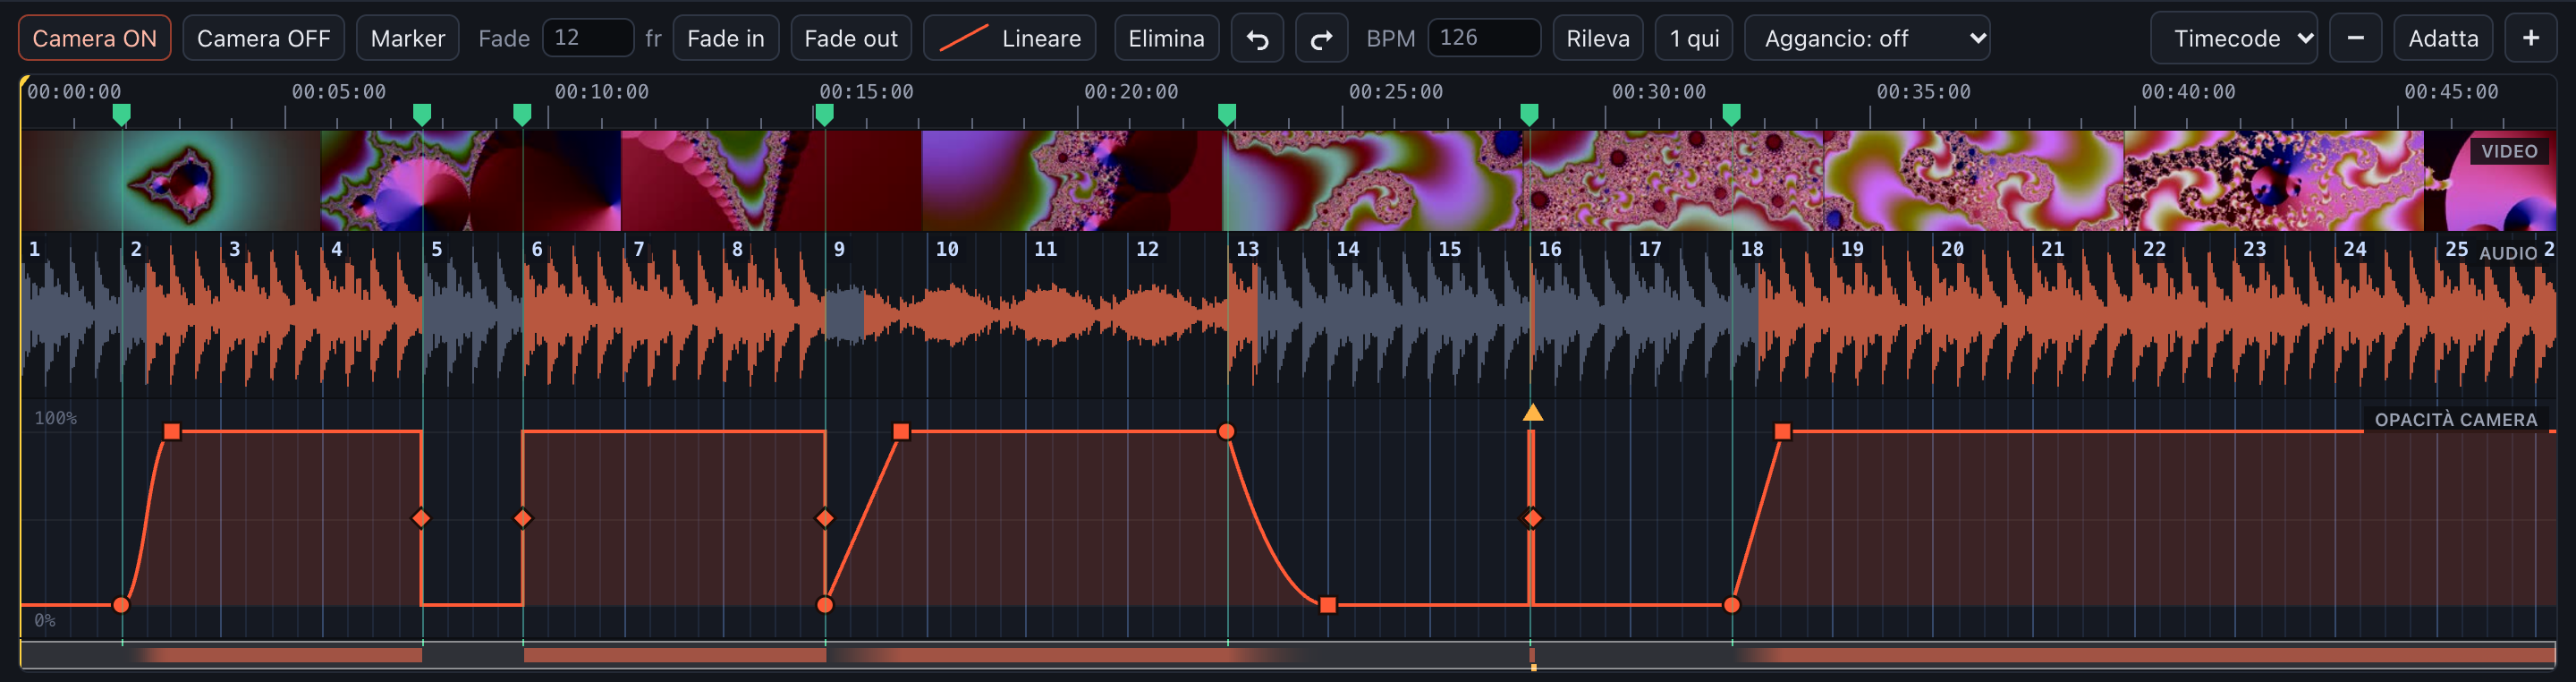
The timeline: ruler with markers, video, waveform with bars, camera opacity
Zoom with ⌘ / Ctrl + scroll wheel, + / −, or Adatta (Fit, F) to see the whole song. Click anywhere to move the playhead. To give the timeline more or less height, drag the edge above its toolbar (see Fitting the window).
Everything is measured in frames of the visual: every point sits exactly on a frame boundary.
A cut switches the camera instantly.
- Camera ON (
I): camera at 100% from the playhead. - Camera OFF (
O): camera at 0% from the playhead. - Double-click on the opacity lane: a cut at that frame, toggling the current state.
A fade starts at the playhead and lasts the number of frames set in Fade … fr.
- Fade in (
⇧I) and Fade out (⇧O). - The curve button next to them (it shows the current curve, e.g. Lineare) sets the curve of new fades.
Curves
Section titled “Curves”The curves are Arena’s own, so a fade looks exactly as if you had picked the curve in Arena’s envelope editor. In Arena each fade is just two points, with the curve on the second one.
Curves are picked from a grid with a small preview of each one:
- each column is a family: Lineare (linear), Quadratica, Sinusoidale, Circolare, Esponenziale, from the gentlest to the sharpest;
- the first row is the simple curve, the second row (S) its S version, slow at both ends.
You don’t choose between in and out: it follows from the fade. A fade in gets the in curve (row IN) and a fade out the out one (row OUT), and the previews rise or fall to match. Turning a fade in into a fade out switches its curve to the matching version. Hover a curve to see what it does, e.g. parte piano, finisce veloce (starts slow, ends fast).
Fade from black / fade from full
Section titled “Fade from black / fade from full”A fade in where the camera is already on restarts from black: the app adds a cut to 0% and the fade in starts on that same frame. In the same way, a fade out where the camera is already off jumps to 100% and fades out. In the right-click menu these appear as Fade in dal nero (from black) and Fade out dal pieno (from full). One undo removes both points.
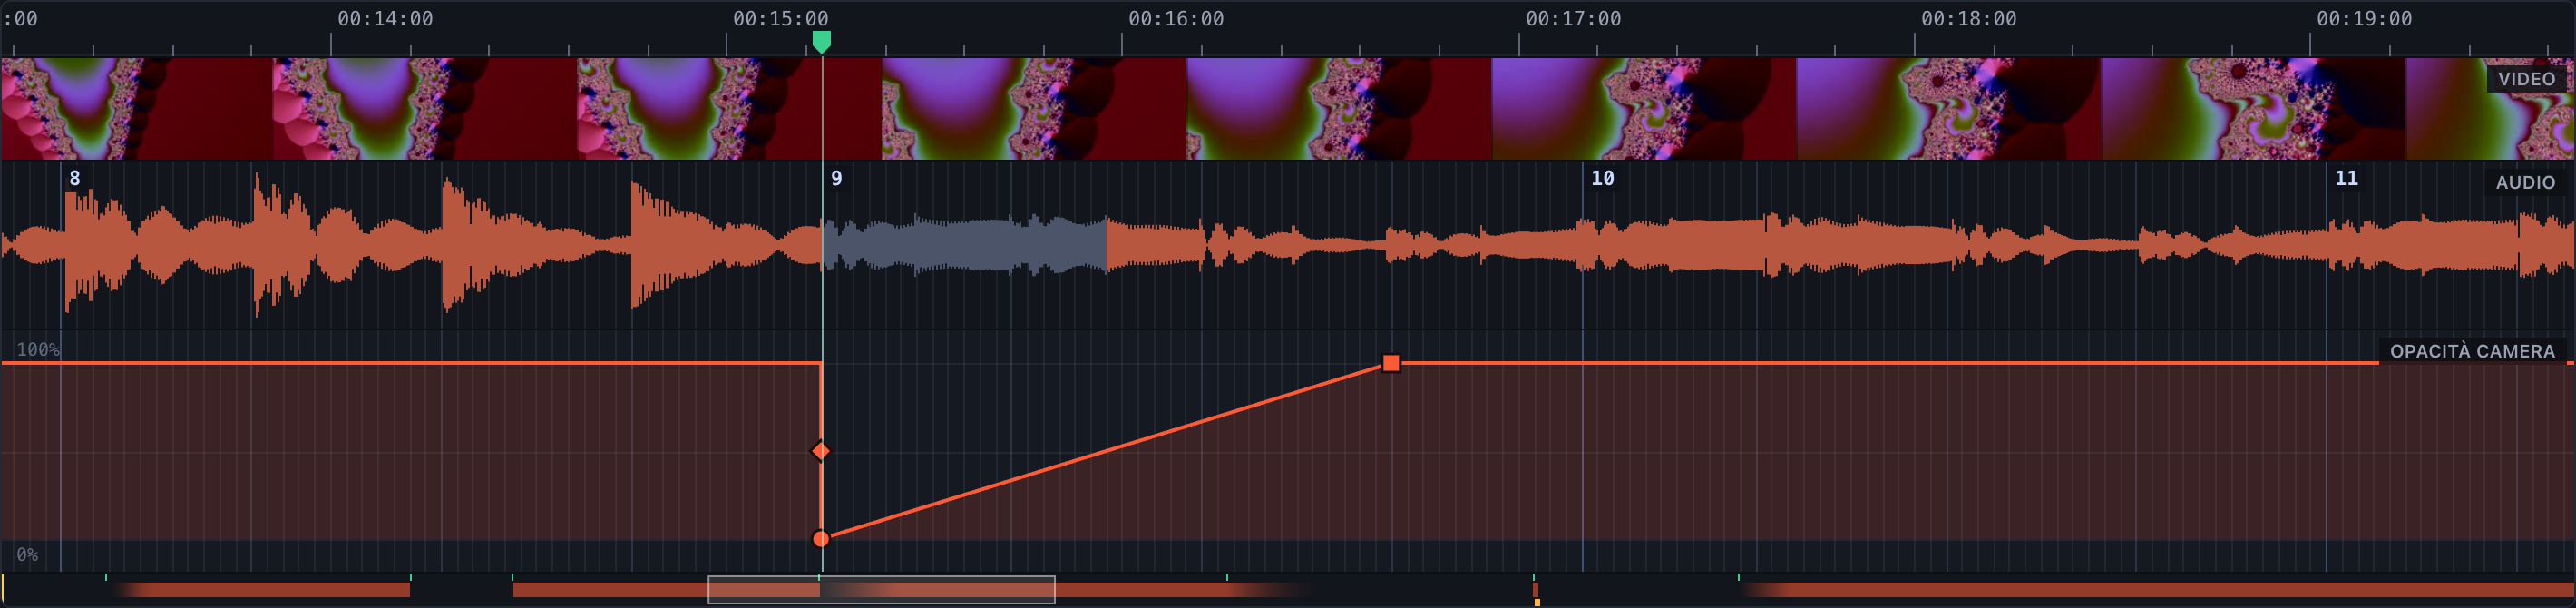
Fade in from black: a cut to 0% and a fade in on the same frame
Editing points
Section titled “Editing points”- Drag a cut (its diamond or its vertical line) to move it.
- On a fade, drag the start point (circle) to move only the start, or the end point (square) to move only the end: the other end stays where it is. Drag the line between them to move the whole fade.
- Points stay on whole frames, and snap to markers and to the beat grid when snapping is on. Hold
Altto move them freely. - Click a point to select it; Elimina (Delete) or
Backspaceremoves it. - Right-click a point to switch it between Taglio (cut), Fade in and Fade out (the three buttons at the top), or to pick its curve from the grid. Picking a curve on a cut turns it into a fade.
- Right-click an empty area for Camera ON/OFF da qui (from here), fades, paste, markers and Porta qui la testina (move the playhead here).
[and]jump to the previous / next transition.
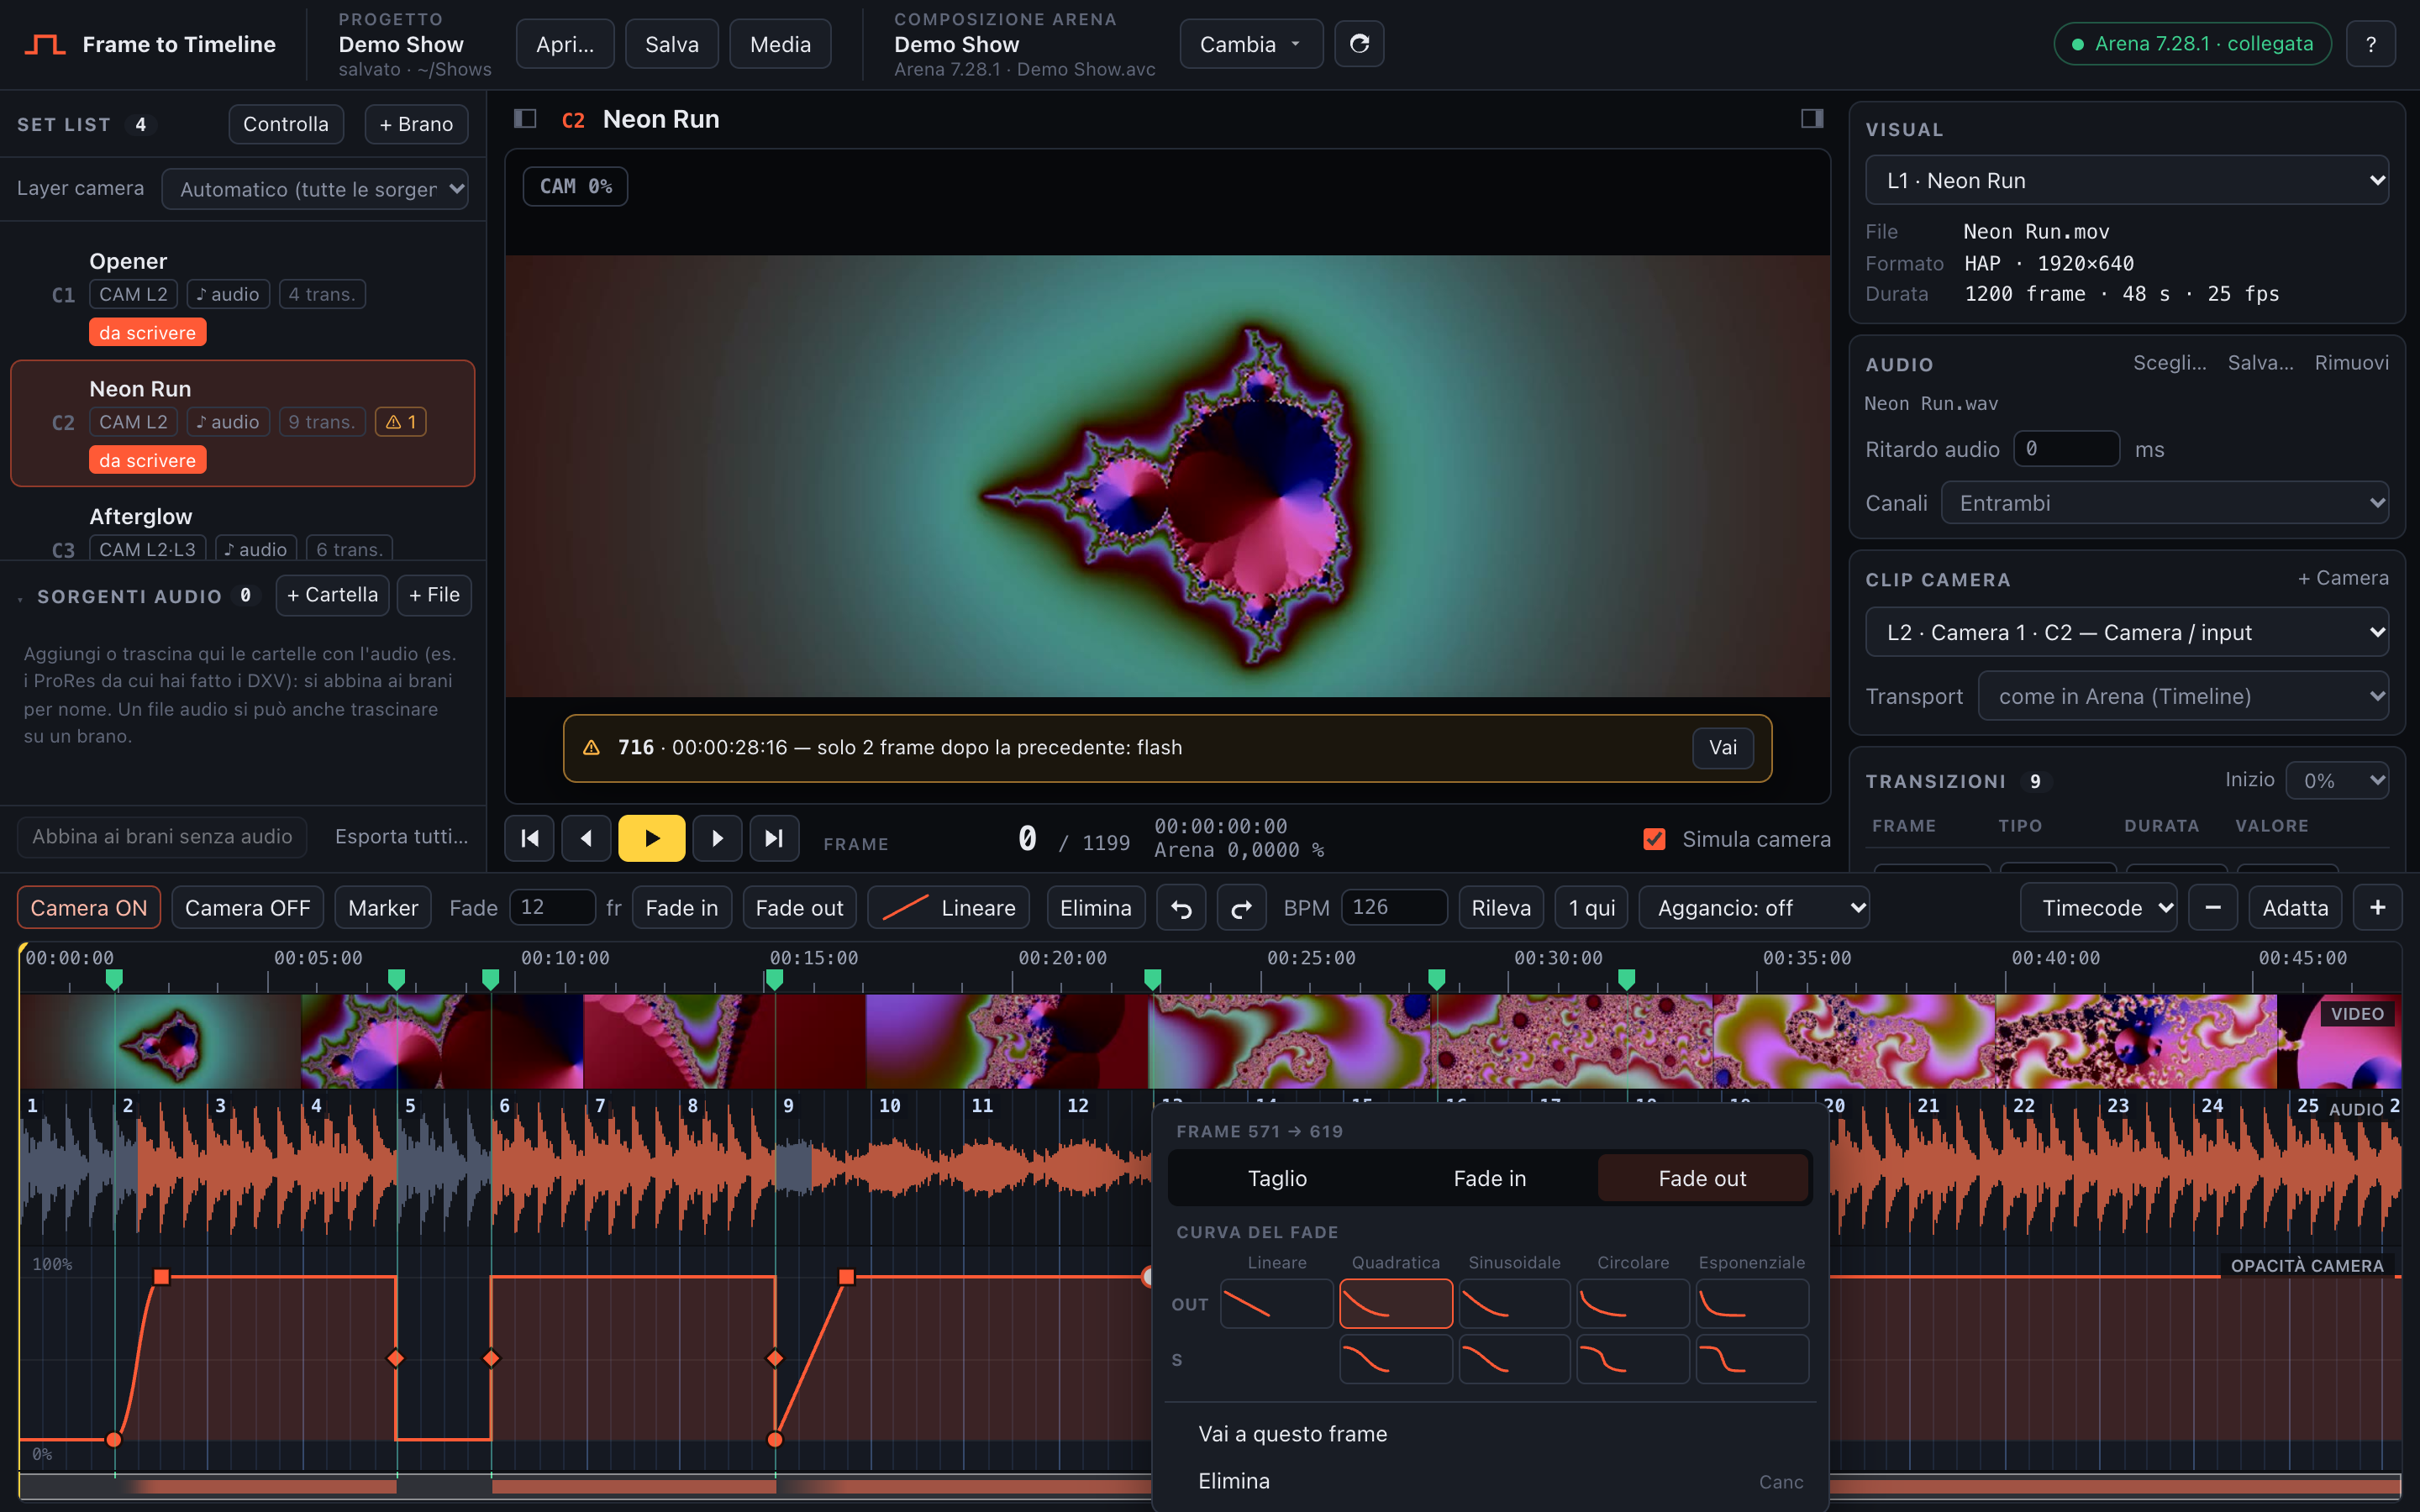
Right-click on a fade out: type, and the curve grid with the OUT curves
The transitions list
Section titled “The transitions list”The Transizioni panel lists every point with its Frame, Tipo (type), Durata (duration) and Valore (value, %). Every field can be typed in directly. Inizio (Start) sets the opacity at frame 0.
Selections, copy and paste
Section titled “Selections, copy and paste”⇧+ drag on the timeline selects a range; the playhead doesn’t move.⇧+ click (without dragging) extends the current range to that point.⌘C/⌘Xcopies or cuts only the keyframes in the range: the empty space before the first one is ignored.⌘Vpastes them with the first keyframe on the playhead, in the same song or in another one. This is handy for choruses that repeat. Keyframes already in the pasted span are replaced; if the camera isn’t at the value the copied keyframes started from, a cut brings it there so the shape is identical.
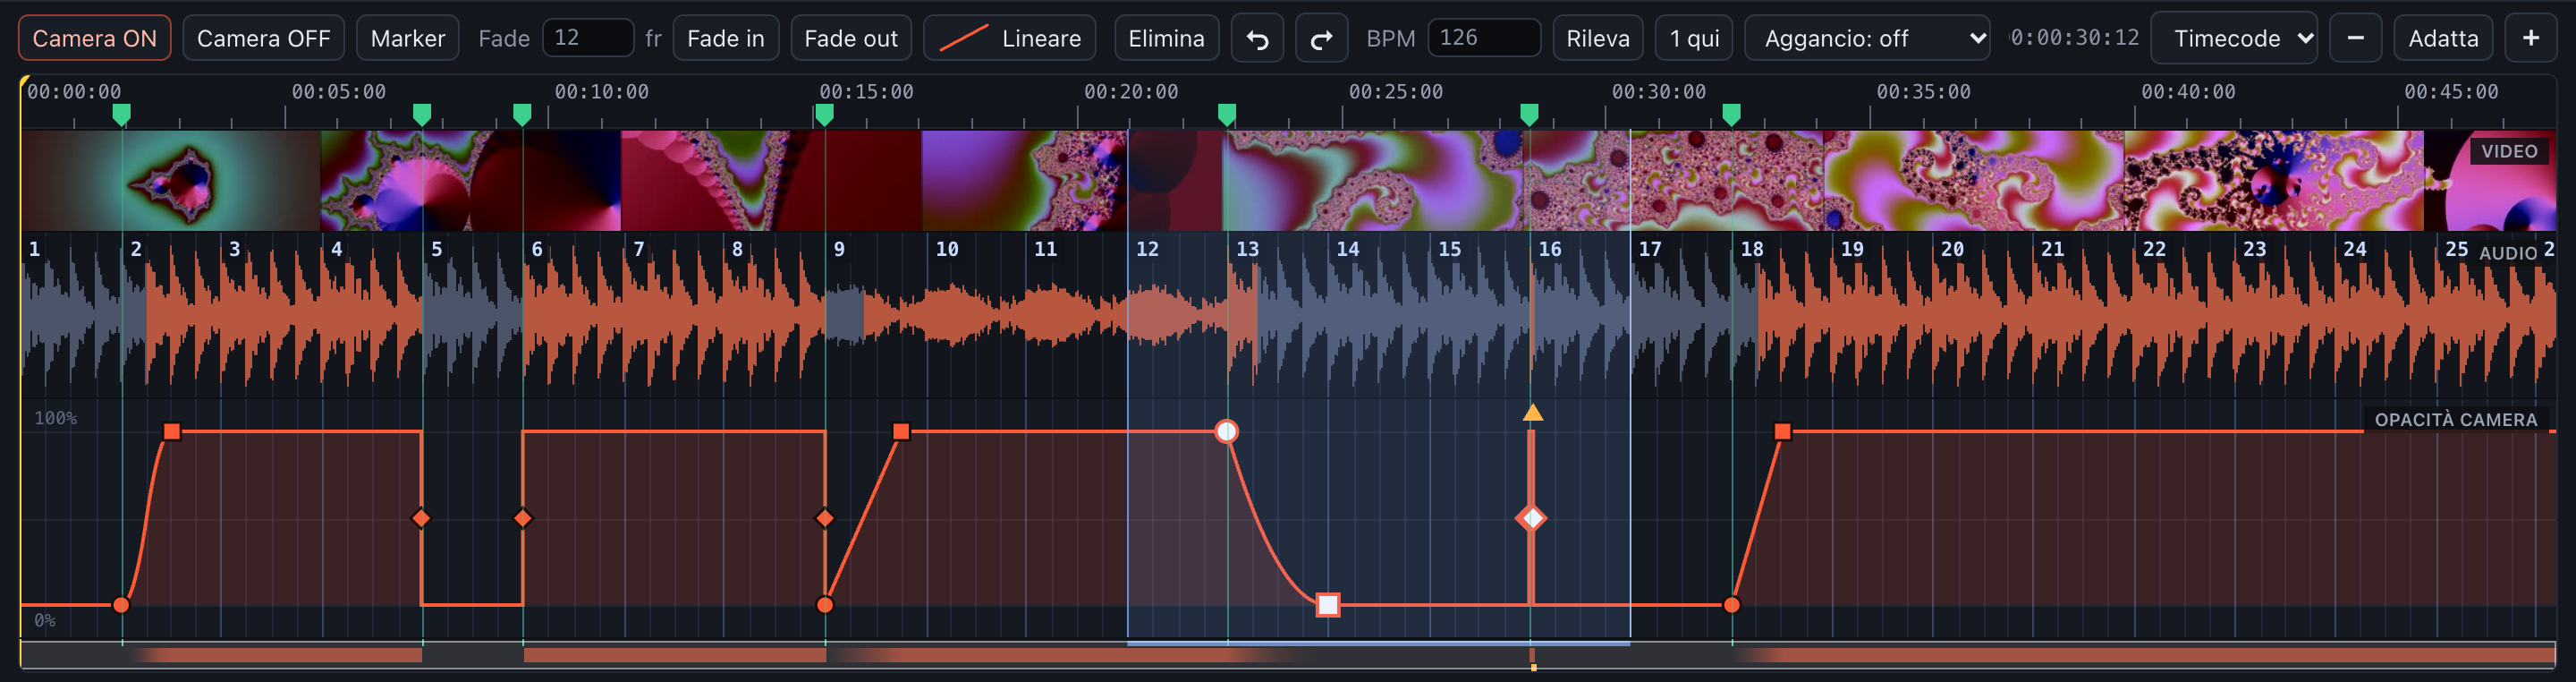
A range selected with Shift + drag
⌘Z undoes and ⇧⌘Z (or ⌘Y) redoes. Each song has its own history, which covers markers too.