Getting started
Frame to Timeline uses FFmpeg and FFprobe to decode the visuals, extract the audio and draw the waveform. They come inside the app (version 9.0.2), so there’s nothing to install. An FFmpeg already on your computer is ignored: older versions decode some DXV files wrongly.
1. Enable Arena’s webserver
Section titled “1. Enable Arena’s webserver”To work live with Arena (reading the open composition, reopening it after a write, checking what Arena loaded) Arena’s REST API must be on:
- In Arena open Preferences ▸ Webserver.
- Turn on Enable Webserver & REST API.
- Leave the port at 8080 (the app reads the port from Arena’s preferences).
The badge on the right of the top bar shows the connection: Arena 7.x · collegata (connected) in green, or a warning if Arena is closed or not answering. Click it for a checklist of what is missing.
2. The welcome screen
Section titled “2. The welcome screen”When the app starts you land on the welcome screen. You can come back to it at any time by clicking the Frame to Timeline logo in the top-left corner.
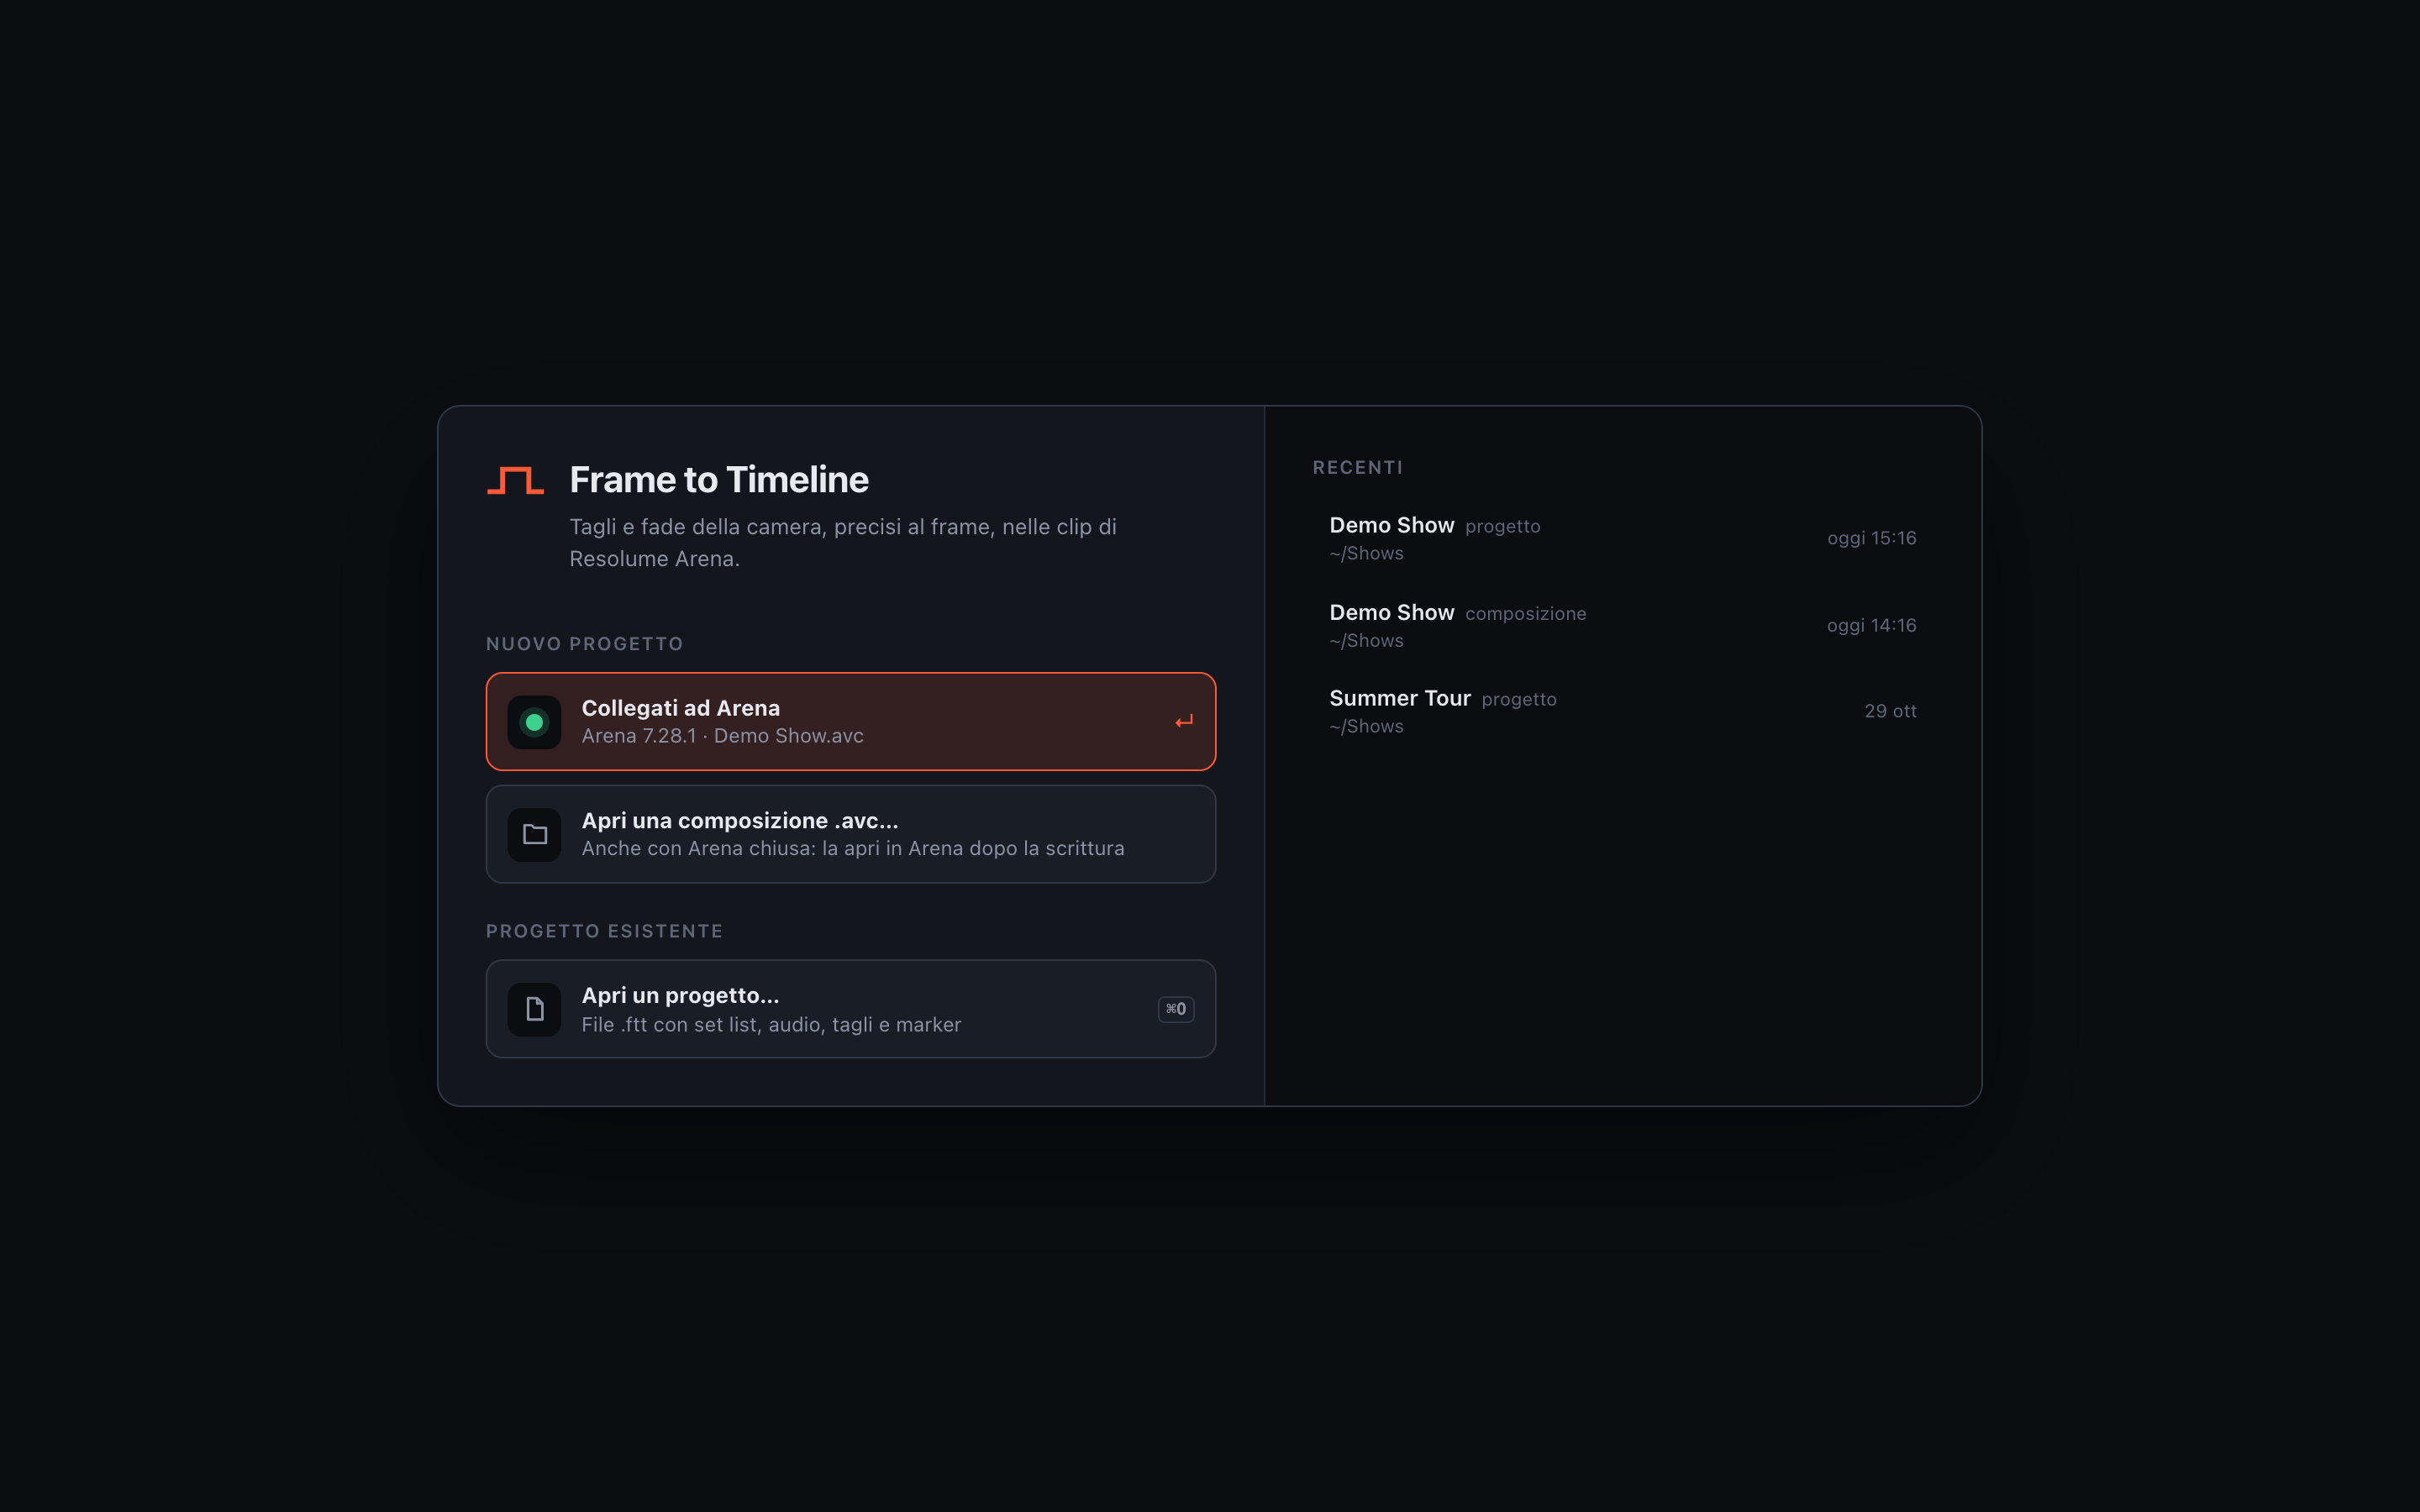
The welcome screen
New project (Nuovo progetto)
- Collegati ad Arena (Connect to Arena): starts a project from the composition currently open in Arena. The row shows Arena’s version and the composition name, and lights up when Arena is reachable. If the composition open in Arena has never been saved, save it in Arena first.
- Apri una composizione .avc… (Open a composition): pick an
.avcfile directly. Works with Arena closed.
Existing project (Progetto esistente)
- Apri un progetto… (Open a project,
⌘O/Ctrl+O): opens a.fttproject file.
On the right, Recenti (Recent) lists the last projects and compositions you opened. Files that have been moved or deleted are greyed out as non trovato (not found).
If the app was closed with unsaved work, a Lavoro non salvato (Unsaved work) box offers to Riprendi (Restore) or Scarta (Discard) it.
3. The main window
Section titled “3. The main window”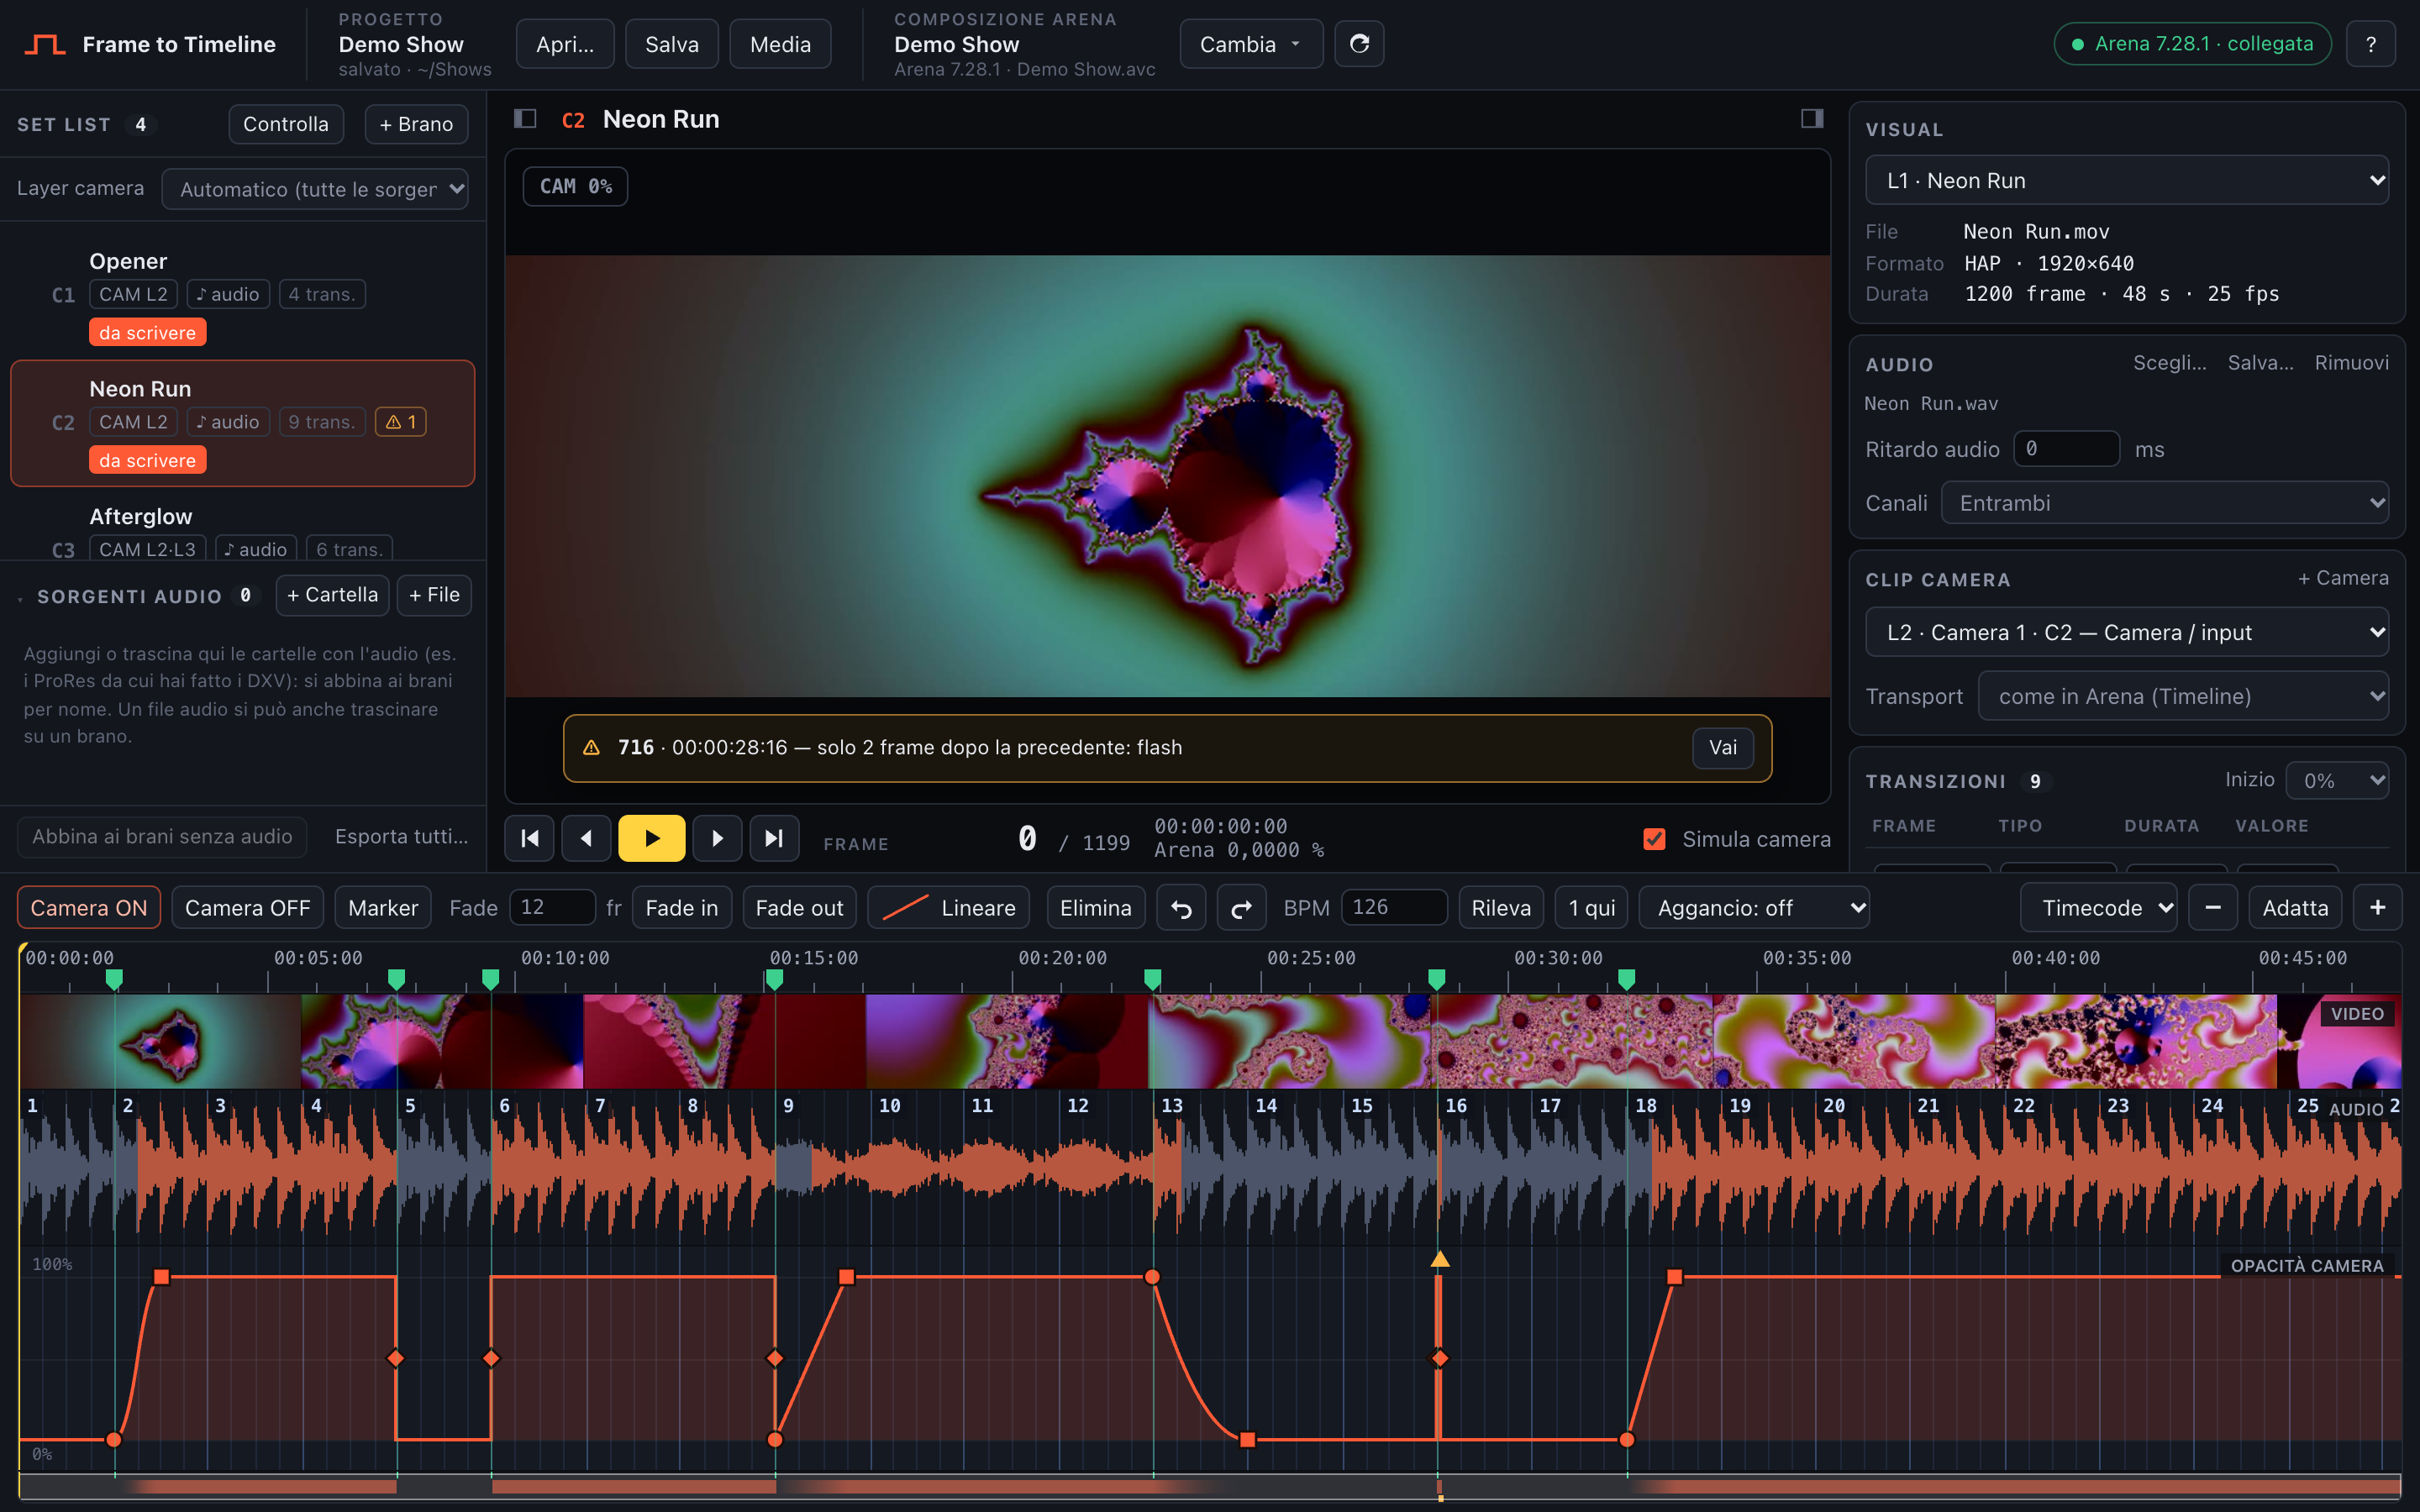
Set list, preview, song details and timeline
- Top bar: the project (name, save state, Apri… / Salva, Media for the media manager) and the Arena composition (name, Cambia menu, reload button), then the Arena status badge and ? for the in-app help.
- Left, Set list: one row per song, with flags for camera, audio, number of transitions and warnings.
- Centre: the video preview with transport controls.
- Right: details of the selected song: Visual, Audio, Clip camera, the Transizioni (Transitions) list and the Scrivi in Arena (Write to Arena) panel.
- Bottom: the timeline with its toolbar.
Fitting the window
Section titled “Fitting the window”The layout adapts to the size of the window, but on a small screen (a laptop, or Full HD with display scaling) you can make room yourself:
- Timeline height: drag the edge just above the timeline toolbar. The opacity lanes stretch to fill the space; when it’s tight, thumbnails and waveform get shorter. Double-click the edge to go back to the initial height. The app remembers the proportion, also on another screen.
- Side panels: the two icons on either side of the song title close and reopen the set list (left) and the song details (right), giving their width to the preview. A closed panel’s icon stays orange. The Scrivi in Arena panel is on the right: reopen it to write.
- Interface size:
⌘/Ctrl++and−scale the whole interface,⌘/Ctrl+0goes back to 100%. At 80–90% a Full HD screen shows as much as a larger one.
Below about 950 pixels of height the app also tightens margins, puts the timeline toolbar on one line and hides the shortcut hints under the timeline (they stay in the help, ?).
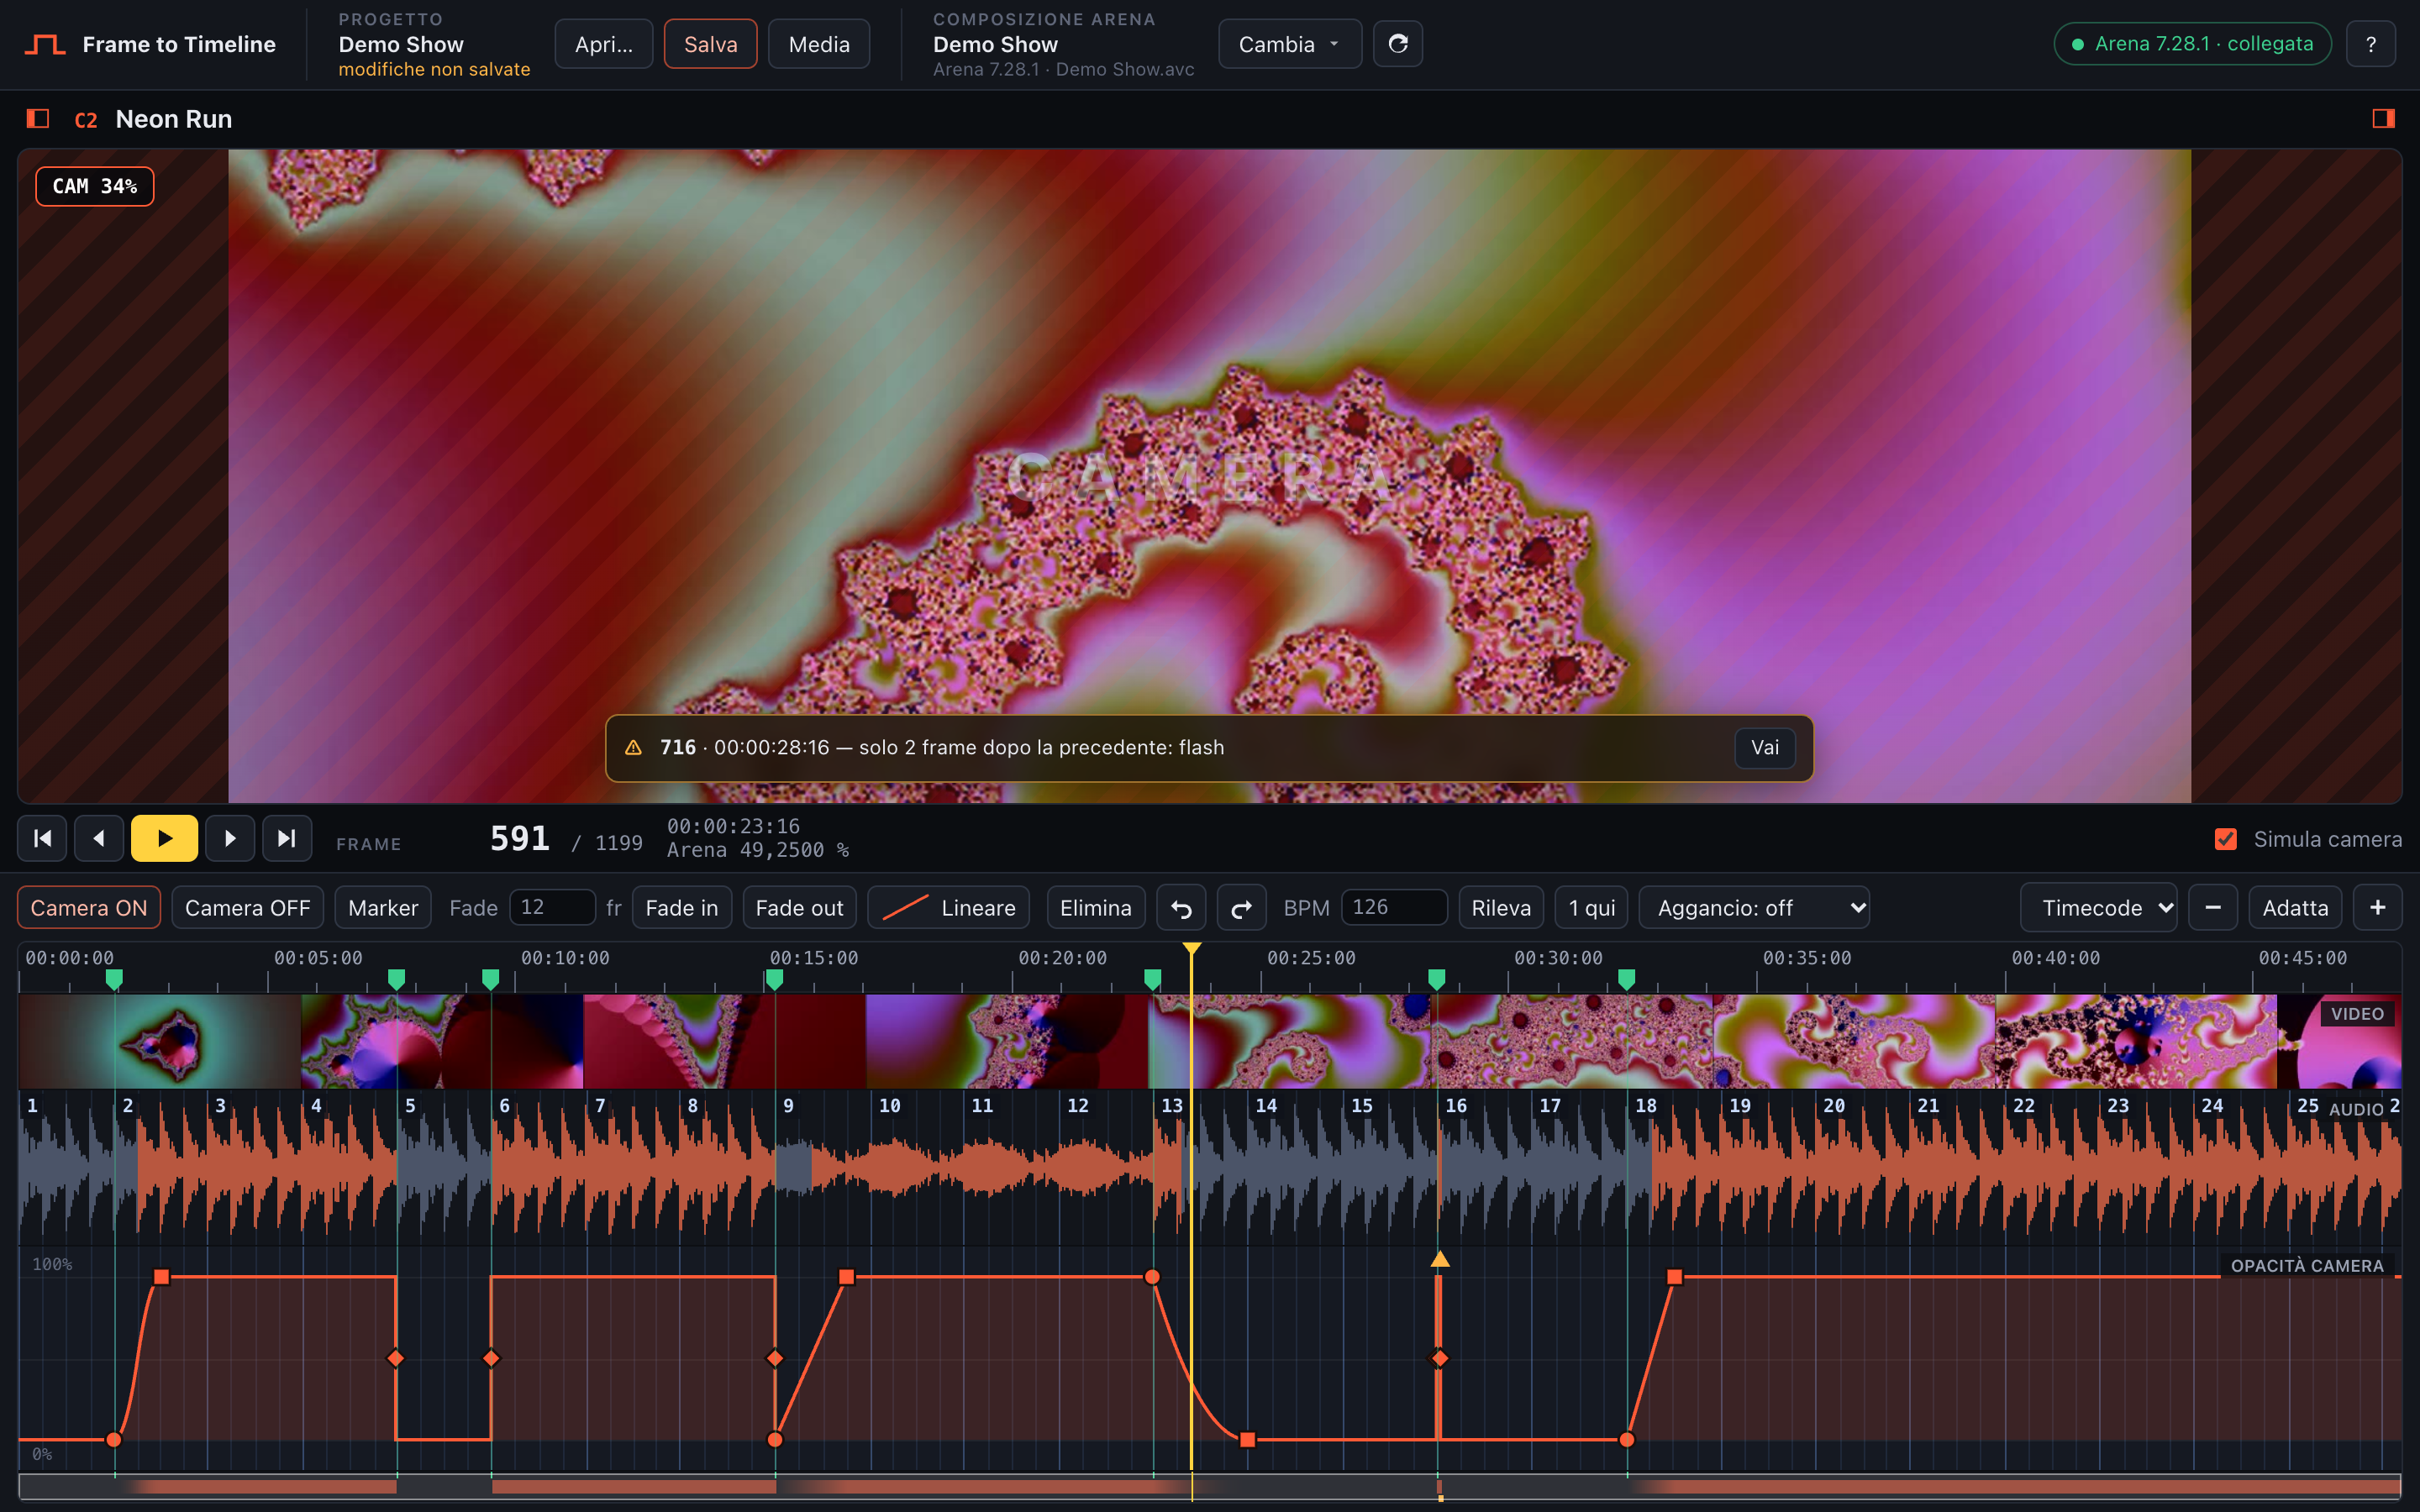
Set list and song details closed: preview and timeline get the full width